Wednesday, July 29, 2009

Earphone Repair

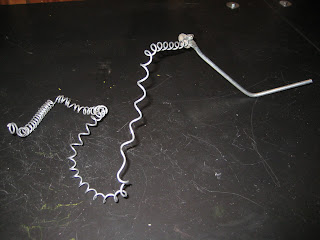
Here's a quick one... well actually two. The first problem was that the little rubber ear cups would fall off of my headphones and risk being lost. To address this problem I flipped them up (that's why they look goofy in the picture) and glued them to the rest of the earbud. Problem two was the difficulty involved in distinguishing the right from the left earbud. They are labeled with R and L respectively, but the lettering is microscopic. I wanted to be able to tell at a glance which one went in which ear, so I took a black marker and colored the right ear bud black. Ahhhh... much better. Sometimes it's the small things in life.

Saturday, July 25, 2009

Laundry Post Removal

Our house has a beautiful and large back yard. When I moved in, one of the first things that I noticed was the odd placement of the laundry line. For starters, it runs north-south meaning that the laundry gets mostly morning or afternoon sun. The worse, and truly baffling thing about the position of the laundry line, is that it perfectly bisects the yard. This makes the yard look smaller and also cuts up the usable space for things like tossing a disc. For about a year I considered taking it out and I finally got around to doing it.
As I assumed, the post was embedded in a chunk of concrete. All I had to do was dig it up. So I started digging. The plan was to dig out the post that was in the middle of the yard and swing it 90° and re-bury it so that the laundry line ran along the fence instead of straight through the middle of the yard.
It turned out to be a very sizable chunk of concrete that it was buried in, but I figured that if I got it mostly uncovered on one side, I should be able to tug it out by pushing or pulling the post.
Now that I had the concrete block partially uncovered, I wanted to try just tugging on the post to leverage the whole thing out. I enjoyed this small part of this project because I got to use two of my favorite knots; the clove hitch, and the butterfly knot. I took my static rope (8,000 lbs breaking strength, <2% stretch) and attached it to the top of the post to be removed and to the bottom of the fixed post - both with clove hitches.


I used some carabiners to set up a 6:1 pulley system so I could really yank on the post. I pulled and I pulled and all that happened was that this 4" thick steel post started to bend. So I dug out a bunch more and tried again, but still got nothing.Finally we decided that the only thing left to do was to cut off the post and bury the concrete block. We never found the bottom of that block of concrete and can only assume that it is contiguous with the foundation of the house. The only problem now was that it would only be a few inches below the surface of the lawn and that made me a little uncomfortable, so I decided to try to bust up the block with a sledge hammer. This turned out to be somewhat difficult as well, but after pounding away at it for about 3 hours a day for a week, I got it down about 5 inches. I cut off the remaining chunk of the post and called it good. In addition to a lot of sweat on my part, this project cost me the handle of the sledge hammer I was borrowing from my land lord. You can look forward to a post about that repair.

Monday, July 20, 2009

Retrodirect II

Finally, I bring you the long over due entry on my second attempt at the retrodirect. You may recall that I had this up and running for a bit but it didn't last for long. It is for that reason the this post is labeled 'Retrodirect II'.

Since I had destroyed my larger inner freewheel on attempt I, I needed to replace that. Since the ACS freewheels were the only ones I could find >21 teeth (and we learned last time that those don't work for this purpose) I decided to get a small freewheel that would work for my purposes and just add some teeth. On the right is an 18t Dicta freewheel that has no lip and can therefore have a BB cup threaded through the back of it (without modification). On the left is a 24t sprocket from a multi-speed freewheel. My plan here is to mount the 24t sprocket onto the smaller freewheel so that I end up with a 24t freewheel. The inner diameter of the 24t sprocket is almost perfect to fit over the body of the 18t freewheel with the exception of those four little nubs.
My first step was to grind off the nubs so that the 24t sprocket would fit over the freewheel body.
Now that the sprocket would fit over the freewheel, I lined them up and drilled holes so I could use small bolts to attach them.
To make sure that the sprocket stayed on the freewheel, I laid on a thick application of JB Weld before sliding on the sprocket to bolt it.
Then I tightened down the bolts (with high strength thread locker) and threw it in the vice to cure. Note that I put a sheet of newspaper in the vice to prevent any leakage from welding my new 24t freewheel to the vice.
As you may recall, I need to put a spacer on the hub before I thread on the first freewheel. I chose to use a track cog instead of the typical bottom bracket lock ring so that I would also have a fixed cog on the same wheel to give me even more versatility. I put on high strength thread locker to help it stay put.
I next threaded on my modified 24t freewheel.
Then I threaded the bottom bracket cup into the remaining threads of the first freewheel.
The last piece is the small, outer freewheel which threads onto the bottom bracket cup.
That's what the wheel looks like in the frame. Note that the rim is intentionally not centered between the axle nuts. I had to use an extra long axle to accommodate the freewheels, so I had to re-space the dropouts by asymmetrically coldsetting the frame. I could have re-dished the wheel and done a symmetric coldset, but this was less work, so there it is.
The next thing I needed was a floating pulley so the chain could run directly from one freewheel to the other. For this, I sawed off the cage and jockey pulley from an old rear derailleur, and bolted it to a stiff steel spring. On the other end of the spring I had an aluminum bar liberated from a broken rear bike rack. The bar holding the floating pulley assembly went up between the chain stays and was fastened to the seat tube with a hose clamp. Notice that I put a short section of old inner tube down first to protect the frame. There's a little chainstay bridge that used to have a kickstand attached. This piece of the frame keeps the aluminum rod from getting pulled back towards the rear hub.
Here's the final setup. I posted a teaser of this a while back that shows it in action.
It's a pretty convoluted chainline, but it works.
Except when it doesn't. I learned my lesson from the last build and planned to do small rides around town for a while before trusting this thing on a longer trip. This turned out to be a very good idea. It was perfect for a day or two but then disaster struck. I was going along on a particularly bumpy section of multi-use path and hit a seam in the concrete surface. This seems to have derailed the chain from the floating pulley. The chain then got lodged between the pulley and the sides of the derailleur cage. As I pedaled forward, unaware of this event, the chain pulled the floating pulley assembly back towards the rear hub and then proceeded to wrap it around the hub a few times before totally binding up. It completely stretched out the spring, bent the aluminum rod, and ripped a few teeth off of the idler pulley. I was able to drop down to single speed so that I could make it home, but once again I my new retrodirect had failed me. Not to despair, this means only that I will have yet another opportunity to perfect this all but simple drivetrain. Stay tuned for RDIII coming soon!

Wednesday, July 15, 2009

Light Fixture

My bedroom had a very old, dim and unattractive light fixture that didn't really properly illuminate the room at night, so I wanted to make something a little brighter. The designed I came up with features light bulb sockets floating at the end of flexible moldable arms extending from the base of the fixture. My original idea was to use flexible conduit for these arms, but they didn't seem up to the task of holding their shape. Instead I decided to use some 1/2" vinyl tubing and just rely on the Romex to provide the shape. After I had the thing built, it turned out that the Romex wasn't stiff enough to hold up the weight of the bulbs, so I needed to come up with a little something more. I just put in a section of coat hanger and then it worked beautifully.

All the parts laid out ready for construction.

My first step was to insert the light bulb socket into the PVC nipple. These to parts are not designed to go together so it took a little coercion. Ultimately I felt that this junction was not secure enough so I went over it with some Goop and felt much better about it.

Next, I fed the Romex through a section of vinyl tubing and connected it to the leads from the socket. Note that I carved the wings off of the yellow wire connectors so that they will fit inside the tubing. Also for the same reason, I staggered the junctions so that they aren't right next to each other (you'll see why in a minute).

I next wrapped the connection up with electrical tape just to keep it as a tight little package to help me get the tubing over it.

With a tiny squirt of WD-40 I was able to slip the tubing sections over the wire connection I had made and onto the end of the PVC nipple.

To attach the 'arms' to the base, I needed a very bizarre adapter to go from the vinyl tubing which was in the plumbing department to the handy box which was in the electrical department. It turned out that the exact piece I needed exists and was in found in the electrical department. It's a 90° PVC elbow with a normal conduit termination on one end that can insert into the handy box and then accept a conduit lock nut to secure it into the base. On the other end it has a nipple for the 1/2" vinyl tubing and then a cup that comes over the tubing and threads on to secure it in place. I have no clue what application this part normally has, but I'm glad that it exists.

There's the finished product installed. I mounted a piece of cardboard behind it because the wall is weathered in the shape of the old fixture. On it I wrote the words "יְהִי אוֹר" or "Let there be light". Indeed, the lighting situation is dramatically improved.

Friday, July 10, 2009

Tool Roll

Encouraged by my success on the apron, I embarked upon another sewing project that I've wanted to do for a long time: a tool roll for the bike tools I carry with me every day.

I started with a big flat sheet of mid-weight nylon. This was nice because it would be a fairly durable material, but also because I didn't have to worry about how to finish the edges. I could just singe them with a candle and they would stay together.

Next, I cut out rectangles of fabric a little larger than the tool they would become the pocket for. I folded and sewed the top edge to finish it and then sewed the pocket onto the backing.

Here's the finished product with each tool on it's respective pocket. The pockets are open on top because I have a flap that folds over before I roll it up which keeps everything inside. One thing I found I needed to do to get the flap to stay down was to sew the corners of fold down.

For my spare tube (and a short section of tire to make a patch in case I skid through a tire) I put a little strap with a ladder lock buckle because. As a closure mechanism I found a Velcro wrap that is hook on one side and loop on the other. It's of a very fancy low profile design that doesn't snag or get burred but still sticks very well.

The final touch on the Velcro strap was to sew a little tab of the nylon material to make it easier to peel up.

Monday, July 6, 2009

Apron

This is my exciting debut into a new medium: sewing! I borrowed this cute little sewing machine from a friend for a project that I haven't yet undertaken (you'll get to see it when I finally do) but didn't end up using it until this project. My brother just graduated from college and I wanted to get him something special, but I couldn't think of something good that he would actually use. The idea I eventually came to was that I wanted to pass on my bread-making tradition on to him now that he was going into the wide world and would need to make his own bread. So I decided to get him a pair of bread pans (the fancy silicone ones that I use), make him a recipe book of my bread recipes, and to make him an apron (that's where the sewing comes in). I should add that the day I chose to make the apron, I had a friend visiting who is costume designer and has a fair bit of experience with a sewing machine, so I had good help on my maiden voyage into the land of sewing.

We decided to fold the cloth over to make the apron double layered. This ended up being easier and looking much nicer. Then I cut out the rough shape of the apron (note this is the back face of the fabric so that I can turn it inside out when I'm done).
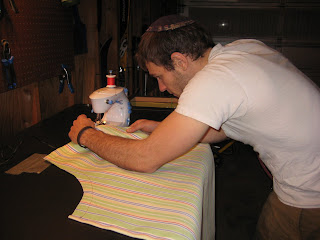
I sewed around the edge and inserted the straps at the appropriate places (sticking inward of course) and double stitching over them for security. The last thing I had to do was to put on a front pocket. I decided to make this out of terrycloth so that there's a built in towel to wipe off the hands. A few layers of this turned out to be all that the little machine could handle but it eventually made it. After I finished sewing the pocket onto the front of the apron, I proceeded to seal up the side.

And there's the finished product. I chose to put side release buckles on the waist strap rather than leave it as a tie so that it was a little quicker to get on and off. Unfortunately I don't yet own an iron, so the seams were a little puffy, but other than that I felt pretty good about my first sewing project.